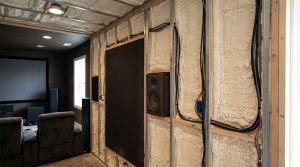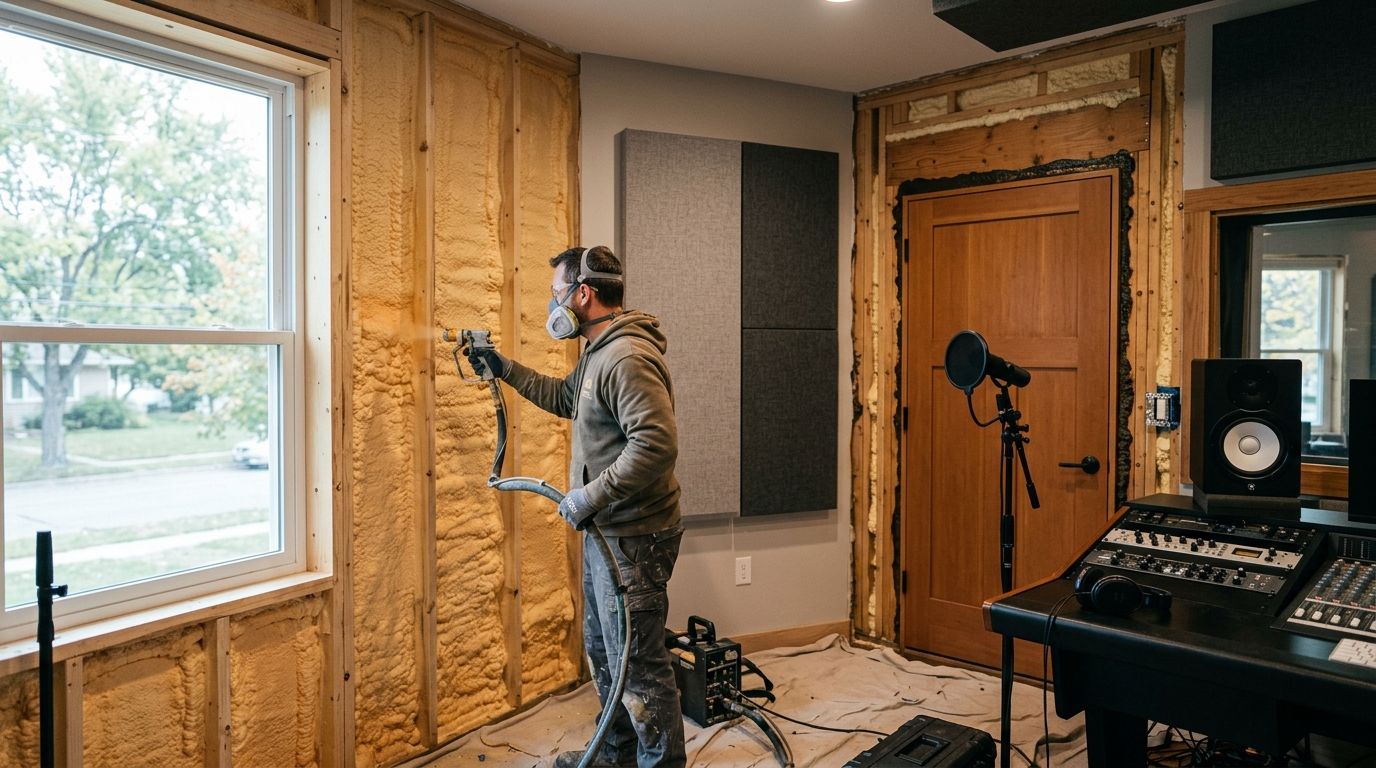
Home recording studio spray foam insulation seals air leaks and adds mass-backed sound control at the same time, with the goal of keeping HVAC hum, street noise, and neighbouring rooms out of your recordings. A musician's cavity needs both an airtight seal and a foam type matched to frequency absorption — a homeowner insulating an attic only cares about R-value.
- Spray foam insulation recording studio projects need open-cell for absorption and closed-cell for air sealing — most rooms need both.
- Aztec Spray Systems applies both foam types across Calgary, Okotoks, High River, and Lethbridge studio conversions in 2026.
- Spray foam alone won’t stop bass leakage through a shared wall — mass-loaded vinyl or an extra drywall layer does that job.
- Seal the door and electrical boxes before buying acoustic panels; panels absorb sound, they don’t stop air leaks that carry it.
Why spray foam insulation matters for home recording studios
A converted garage, basement, or bonus room studio usually started life as an unfinished space with no thought given to sound isolation. The stud bays sit half-empty, the rim joist is bare, and the door is hollow-core. Every one of those gaps is a path for HVAC noise, traffic rumble, and voices from the next room to bleed into a take.
Spray foam closes that air path in one pass instead of patching it room by room. It also adds thermal performance you'd otherwise pay for separately — useful in Alberta, where a converted garage studio can swing 15°C between a January morning and a summer afternoon without proper insulation. If the studio shares a wall with a bedroom or living room, soundproofing insulation for shared walls is the closest match to what a recording space needs: air sealing plus a foam type chosen for absorption, not just R-value.
Update your air-sealing plan before you touch acoustics
Most home studio owners buy acoustic foam panels first and address air leaks never. That order is backwards. A panel absorbs reflections already inside the room; it does nothing for the gap under the door letting in the furnace blower two rooms over.
Audit your studio space for air leaks and thermal gaps
Start with a walkthrough, not a purchase. This step costs nothing and tells you exactly where foam needs to go.
- Hold a lit incense stick or smoke pencil near outlets, window trim, and the top plate on a windy day
- Check the attic hatch, garage door seal, and rim joist if the studio sits over a crawlspace or unheated garage
- Note any exposed or half-filled stud bays in an unfinished garage or basement conversion
- Look for slumped fiberglass batts leaving a gap at the top of the cavity — a common failure point in older builds
Choose the right foam type for sound and temperature control
Open-cell and closed-cell spray foam behave differently for a recording space, and picking the wrong one means redoing the job.
- Open-cell spray foam runs roughly R-3.5 to R-3.7 per inch and its lower density absorbs more mid and high frequency energy inside the cavity
- Closed-cell spray foam runs roughly R-6.5 to R-7 per inch, seals tighter, and blocks more airborne flanking noise through penetrations and seams
- A mixed approach — closed-cell at the rim joist and any below-grade cavity, open-cell in interior stud bays — controls both drafts and reflections in one wall assembly
- This is where a contractor pass matters more than a DIY kit: Aztec Spray Systems applies both foam types with equipment that holds a consistent cell structure across an entire cavity, which a canister kit rarely achieves on a full wall
Seal the room's air path before you treat acoustics
Panels and bass traps go up after the shell is airtight, not before.
- Caulk or foam gaps around electrical boxes, HVAC penetrations, and conduit runs first
- Weatherstrip the studio door itself, not just the wall framing around it
- Add a foam gasket behind outlet and switch plates on any shared wall
- Confirm no daylight or airflow is detectable at any seam before installing acoustic panels
Add mass and dampening layers on top of the foam
Spray foam air-seals a cavity; it does not stop low-frequency energy from passing through a single layer of drywall. Bass below roughly 250 Hz needs mass, not just a sealed air gap, to attenuate.
- Layer mass-loaded vinyl or an extra sheet of drywall with a viscoelastic damping compound between layers over foam-filled cavities
- Stagger seams from the layer below so there's no continuous joint carrying sound straight through
- Float the added layer on resilient channel where possible instead of screwing it directly through the same studs
- Skip stacking foam thickness expecting it to replace mass — it won't move the needle on bass leakage
Address the ceiling and floor transitions
A studio below a bonus room or above a garage needs the same treatment at the floor and ceiling that the walls get.
- If the space sits under a converted room, insulating a bonus room above the garage covers the floor cavity approach that also protects a studio directly underneath
- Insulate around any HVAC duct running through the ceiling cavity — this cuts drafts and mechanical hum at the same time
- Where the studio shares a floor with living space above, add mass to the subfloor before the finish floor goes down
Install a door and window plan that matches the walls
A hollow-core door undoes every hour spent on wall treatment. This is the most commonly skipped step in a home studio build.
- A solid-core door with an automatic door bottom does more for isolation than additional wall treatment behind a hollow-core door
- Seal window frames with foam backer rod and caulk, or add a secondary interior storm window on a street-facing wall
- Skip cheap adhesive-backed foam weatherstripping alone — it compresses flat within a season of regular door use
Test and tune before you commit to acoustic panels
- Play a mix at working volume and walk the perimeter of adjoining rooms with an SPL meter app
- Note where sound reads loudest outside the room — that's a remaining air leak, not a spot needing more absorption
- Re-seal any spot where the reading spikes before adding acoustic panels; a panel does not fix a leak
If the studio doubles as a home office during the day, the same air-sealing pass pays off twice — see insulating a home office for energy efficiency for the overlap between comfort and quiet.
“Spray foam alone won’t stop bass leakage through a shared wall — it needs mass, not just an airtight seal, to attenuate low frequencies.”
Comparing your options for a studio build
| Option | Best for | Key limitation | Verdict |
|---|---|---|---|
| Closed-cell spray foam | Air sealing and moisture control in garage or basement conversions | Less acoustic absorption alone than open-cell | Buy |
| Open-cell spray foam | Absorbing mid/high frequency reflections inside stud bays | Not a moisture barrier; needs a vapor retarder in some assemblies | Buy |
| Mineral wool batts + resilient channel | Budget acoustic decoupling without a full foam job | Doesn't seal air leaks; still needs caulking at every penetration | Hold |
| Mass-loaded vinyl + drywall layer | Adding low-frequency isolation on top of foam | Adds no thermal value, only isolates sound | Buy (as a supplement) |
| Standard fiberglass batts, no foam | Existing budget builds with no isolation requirement | Settles over time, leaves air gaps that carry flanking noise | Skip if isolation matters |
Get a studio insulation plan
Talk through open-cell vs closed-cell for your room before you book the job.
Common mistakes home studio owners make
- Buying acoustic panels before sealing air leaks — panels absorb reflections already in the room, they don't stop sound entering through a gap
- Spending on wall treatment while ignoring the door — a hollow-core door undoes hours of foam work
- Overlooking the HVAC path — ducts carry sound and drafts between rooms more than the walls do in a shared-wall studio
- Using only open-cell foam in a below-grade room — open-cell isn't a vapor barrier, and moisture problems follow in a basement studio
- Assuming R-value alone equals sound isolation — thermal performance and acoustic isolation are related but not the same spec
FAQ
Does spray foam insulation soundproof a recording studio?
Spray foam seals air gaps that carry sound between rooms, which cuts flanking noise, but it doesn’t fully soundproof a room on its own in 2026 or any year. Mass-loaded vinyl or an added drywall layer with damping compound handles the low-frequency isolation spray foam can’t.
Is open-cell or closed-cell spray foam better for a home studio?
Open-cell foam absorbs more mid and high frequency reflections because it’s less dense, while closed-cell seals tighter and blocks more airborne noise through gaps. Most studio conversions use closed-cell at the rim joist and open-cell in the interior stud bays.
Can I insulate a garage studio myself with spray foam?
Canister kits can seal small gaps, but they rarely produce the consistent cell structure a full wall cavity needs for even sound absorption. A contractor pass covers the whole cavity in one application instead of patchwork spots.
How much R-value does a home studio need?
A studio in a converted garage or basement generally targets the same R-value as any finished living space in that assembly, since the goal is comfort as much as isolation. Air sealing matters more than pushing R-value higher once the cavity is filled.
Does spray foam stop bass frequencies from leaking through walls?
No — bass below roughly 250 Hz needs mass to attenuate, not just an airtight cavity. Add mass-loaded vinyl or a second drywall layer with damping compound on top of the foam for low-end isolation.
What’s the biggest mistake people make insulating a home studio?
Buying acoustic panels before sealing the room’s air path. Panels absorb sound already inside the room; they do nothing for a gap under the door or around an outlet box letting noise in from outside.
Do I need a solid-core door for a home recording studio?
Yes — a solid-core door with an automatic door bottom isolates more sound than additional wall treatment behind a hollow-core door. It’s the single most skipped step in a home studio build.
One last thing
The last few decibels a home studio owner chases usually don't come from more foam — they come from a bead of acoustic caulk around the electrical boxes and door frame after the foam has cured, closing the gaps foam alone can't reach into corners. Test the room with an SPL meter walk before spending on panels; most of what people blame on "not enough absorption" turns out to be an air leak spray foam already should have closed.
Related guides