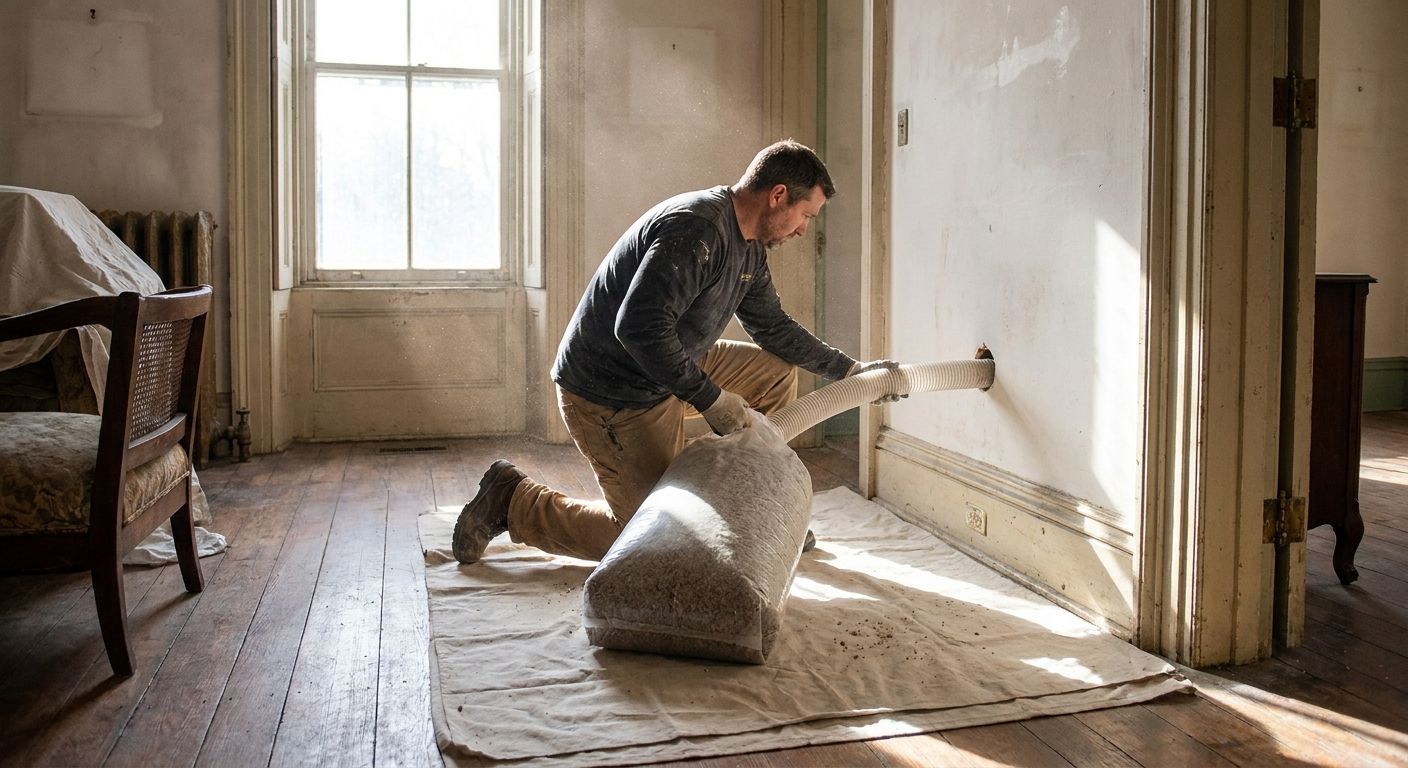
Older homes in Calgary, Okotoks, High River, and Lethbridge lose most of their heat through gaps you can't see: rim joists, knob-and-tube-era attic hatches, and wall cavities that were never insulated to begin with. You don't need to strip the drywall to fix any of it.
- Dense-pack cellulose or injection foam fixes uninsulated 1960s-and-older wall cavities without removing drywall – a full gut is not required.
- Attic and rim joist work delivers the fastest payback in 2026 and should happen before any wall injection.
- A blower door test before and after the job is the only reliable way to confirm air sealing actually worked.
- Aztec Spray Systems handles older-home retrofits across Calgary, Okotoks, High River, and Lethbridge without wall demolition.
Why this matters
A lot of homes built before the 1980s in southern Alberta were framed with 2×4 walls and R-8 to R-12 batt insulation, if they have any wall insulation at all. Attics in the same era often sit at R-12 to R-20, well under the R-50 level that current Alberta code recommends for new construction in 2026.
The fix isn't a renovation. Retrofit techniques like drill-and-fill injection foam, dense-pack cellulose, and closed-cell spray foam in accessible cavities (rim joists, attics, crawl spaces) close the gaps that matter most without opening a single wall. Aztec Spray Systems approaches older-home insulation this way across its Alberta service area, because most heat loss in a pre-1990 house happens at the top and bottom of the building envelope, not in the middle of a wall.
What you'll need
- A visual or professional inspection of the attic, rim joists, and any accessible crawl space
- Access to the attic hatch and, ideally, the basement ceiling or rim joist area
- A caulking gun and fire-rated sealant for small penetrations you can reach yourself
- A ladder rated for attic access, plus a headlamp
- If hiring out: a licensed insulation contractor experienced with spray foam insulation for older Calgary homes, since older framing and knob-and-tube wiring change how a crew has to work
- A half-day to a full day, depending on how much of the house gets treated
The steps
1. Get a real inspection before you touch anything
Guessing where a house leaks heat wastes money on the wrong fix. A contractor walk-through (or a blower door test, where a fan depressurizes the house to find leak points) identifies exactly which cavities are cold and which are already performing fine.
In a typical pre-1980 bungalow, the biggest losses show up at the attic hatch, the rim joist band around the foundation, and any knob-and-tube wall bays that were never filled. Skipping this step means you might insulate a wall that was already fine and miss the rim joist that's actually costing you 15% of your heating bill.
Common mistake: homeowners insulate the attic and stop there because it's the most visible gap, then wonder why the basement is still cold in January.
2. Start at the attic, not the walls
Attic work has the shortest payback of any retrofit in an older home and it never requires touching drywall. Loose-fill or spray foam gets added over existing insulation to bring the attic up to current recommended levels, and the hatch itself gets weatherstripped and insulated on the back.
If you're not sure whether your attic actually needs the work, a quick way to check is whether you can see the tops of the ceiling joists through the existing insulation. If you can, you're likely under R-30 and losing heat every winter of 2026 that passes without an upgrade.
3. Seal and insulate the rim joists
The rim joist band, where the foundation meets the floor framing, is almost always uninsulated in homes built before the 1990s. It's also one of the few wall-adjacent areas you can access from the basement without cutting drywall.
Closed-cell spray foam applied directly to the rim joist band both insulates and air-seals in one pass. This is one of the highest-value fixes in an older home because it stops cold air infiltration at the perimeter, which is exactly what spray foam insulation for basement rim joists is designed to address, and it's a same-day job in most basements.
Expected outcome: a noticeably warmer basement floor and less cold draft along exterior walls within the same heating season.
4. Inject the exterior wall cavities from outside
This is the step that avoids gutting walls entirely. A contractor drills small holes (roughly the diameter of a coin) through the exterior siding, between studs, then injects dense-pack cellulose or a low-expansion injection foam into each cavity. The holes get plugged and the siding patched or repainted to match.
Work happens from outside, so interior finishes, trim, and paint stay untouched. This method works on wood siding, stucco, and most brick veneer, though brick requires more careful hole placement.
Common mistake: trying to DIY wall injection with a rented foam kit. Uneven fill leaves cold spots and voids that are impossible to detect until the next energy audit.
5. Address the crawl space or unfinished basement
If the house sits on a crawl space rather than a full basement, that space is often the single largest source of cold floors upstairs. Spray foam applied to the crawl space walls and sealed at the vents stops both heat loss and moisture problems in one step.
Unfinished basement walls that are still exposed studs and concrete get the same treatment as the rim joists: spray foam directly on the concrete and framing, no drywall removal needed because there's no drywall there yet.
6. Seal penetrations around wiring, plumbing, and old ductwork
Every pipe, wire, and duct that passes through an exterior wall or the attic floor is a potential air leak. Older homes tend to have more of these than newer builds because renovations over the decades added wiring and plumbing without resealing the original penetrations.
A contractor doing whole-home retrofit work will foam or caulk these as part of the attic and rim joist pass. If you're doing a smaller DIY portion yourself, a can of fire-rated foam sealant handles most gaps around pipes and wires in an hour or two.
7. Verify the work with a follow-up check
After the retrofit, a second blower door test or a simple thermal check confirms the air sealing actually reduced infiltration. This step gets skipped constantly, and it's the only way to know whether the money spent actually changed the building's performance.
Compare the before and after numbers if you had a formal test done. A drop of 20% or more in measured air leakage is a realistic result for a home that had significant gaps at the attic and rim joist before the work started.
Troubleshooting
Problem: the attic still feels cold after adding insulation.
Check the hatch seal first. An unweatherstripped attic hatch can undo a large share of the benefit from new attic insulation, since warm air rises straight through the gap around it.
Problem: wall injection holes are visible after patching.
This is a cosmetic finishing issue, not an insulation problem. Ask the contractor about color-matched plugs or plan for a small paint touch-up on that section of siding.
Problem: one room stays cold while the rest of the house improved.
That room likely has a cavity that didn't get fully filled, often due to an internal obstruction like a fire block or old wiring conduit. A localized re-injection at a different access point usually fixes it.
Problem: new musty smell in the basement after crawl space work.
Moisture trapped behind new foam before it's fully cured can cause a temporary odor. It should clear within a few days; if it doesn't, the vapor barrier under the crawl space may need attention.
Problem: higher-than-expected energy bill despite the retrofit.
Older furnaces and single-pane windows still leak heat regardless of wall and attic work. Insulation retrofits reduce losses through the envelope, but a 30-year-old furnace running at reduced efficiency will mask some of the gains.
Get your older home assessed
Find out where your Alberta home is losing heat before winter 2026.
Tools and resources
- Blower door test or professional walk-through inspection
- Fire-rated caulk and foam sealant for DIY-accessible gaps
- A contractor quote that separates attic, rim joist, and wall injection pricing so you can phase the work
- A reference on how to know if your attic needs more insulation if you're unsure whether that's your starting point
- A pre-job walkthrough checklist so the crew has clear access to the attic hatch, basement, and exterior wall sections that need drilling
What to do next
Most older-home projects run in phases: attic first, rim joists next, wall injection last, spread across one or two seasons if budget requires it. Before scheduling a crew, read through what actually happens on install day so you know what to clear out of the way and how long each phase takes; the guide on how to prepare your home for spray foam insulation day covers that walkthrough.
If cost is the deciding factor on whether to do all three phases at once, check current pricing on the site rather than guessing from national averages, since 2026 material and labor costs vary by region and by how much of the house needs work.
FAQ
Can you insulate an older home without removing drywall?
Yes. Drill-and-fill wall injection, attic top-ups, and rim joist spray foam all work from outside the finished wall or from an unfinished basement and attic, so drywall stays intact. This is the standard approach for pre-1990 homes in Calgary, Okotoks, High River, and Lethbridge.
What’s the best insulation method for a home built before 1980?
Dense-pack cellulose or low-expansion injection foam works best for wall cavities in homes this age, paired with spray foam on the rim joists and a top-up in the attic. Together these three areas account for most of the heat loss in an older building envelope.
How do you know if your walls even have insulation?
An infrared scan or a simple outlet-cover check on an exterior wall on a cold day can reveal whether a cavity is empty. Many homes built before the 1970s in Alberta have no wall insulation at all, only insulation in the attic.
Is wall injection foam messy or disruptive?
No. Small holes are drilled from outside, foam or cellulose is injected, and the holes are patched and painted to match. Interior rooms stay untouched during the process.
How much does it cost to insulate an older home in Calgary in 2026?
Costs vary by how many areas need work: attic, rim joists, walls, or crawl space. Checking current pricing directly is more reliable than a flat estimate, since older homes vary widely in square footage and existing insulation levels.
Should I insulate the attic or the walls first?
Start with the attic and rim joists. Both are faster, cheaper per square foot, and typically deliver a bigger comfort improvement than wall injection, which makes them the logical first phase in any older-home retrofit.
Does spray foam insulation cause moisture problems in old houses?
Properly installed closed-cell spray foam acts as a vapor barrier and generally reduces moisture issues rather than causing them. Problems arise when existing moisture is trapped behind new foam without addressing the source first, which is why an inspection matters before the work starts.
Can this work be done in winter?
Rim joist and crawl space spray foam can be done year-round since the work happens indoors. Exterior wall injection is easier in milder months but is still performed through the winter in Alberta when scheduling requires it.
One last thing
The rim joist band is the cheapest, fastest fix on this entire list, and it's the one homeowners skip most often because it's invisible from every room they actually live in. If your 2026 budget only stretches to one phase this year, start there before the attic, not after.
Related guides
- How to prepare your home for spray foam insulation day
- How much does spray foam insulation cost in Calgary