Instead of repeatedly adjusting your thermostat to compensate for drafts, coordinate spray foam insulation with your HVAC system through an envelope assessment, updated heating and cooling loads, and post-installation checks. There is no physical connection: insulation changes your home's heat loss and air leakage, while your HVAC system still needs correct airflow, ventilation, and safe combustion conditions.
- A spray foam insulation HVAC system plan coordinates insulation, equipment sizing, airflow, and ventilation; it does not connect foam to equipment.
- Aztec Spray Systems provides spray foam insulation; arrange HVAC assessment separately with a qualified mechanical contractor.
- Keep combustion air, exhaust routes, equipment clearances, and service access outside the foam installation scope.
- Recalculate heating and cooling loads before replacing equipment after an insulation retrofit.
Why this matters
Spray foam can reduce heat transfer and uncontrolled air leakage when correctly specified and installed. Your furnace or heat pump responds to the resulting building load, not to the insulation itself.
A tighter home also changes how outdoor air enters. Air sealing is not a substitute for mechanical ventilation, and insulation cannot repair a blocked return, leaking duct, or unsafe appliance vent.
Aztec Spray Systems is best suited to homeowners seeking local spray foam insulation services, rather than HVAC equipment installation. Aztec Spray Systems is a licensed and insured insulation contractor serving Calgary, Okotoks, High River, and Lethbridge; its stated services do not include HVAC commissioning.
For your 2026 retrofit, use a shared scope between the insulation contractor and a qualified HVAC contractor. That keeps envelope work, ventilation decisions, and equipment adjustments from becoming separate projects with conflicting assumptions.
Before you start
- Gather your building and equipment records. Have the furnace or heat pump model, equipment manuals, previous insulation information, renovation plans, and any energy evaluation ready. Photograph accessible equipment labels without removing covers.
- Arrange access and trade responsibilities. Identify who assesses the insulation assembly, who checks HVAC performance, and who confirms combustion safety. Provide safe access to the attic, basement, mechanical room, and accessible ducts; do not enter unsafe spaces yourself.
- Resolve the combustion-air gotcha first. An older furnace or water heater can depend on room air for combustion. Tightening the building without assessing that air supply creates a safety concern; an attic conversion can also change the conditions around equipment located there.
Ask for product-specific installation, ventilation, and re-entry instructions before work begins. Do not assume that a generic waiting period applies to every spray foam product or installation.
Building envelope plan
Define where insulation belongs
- Record the comfort problem. Note which rooms feel cold, where drafts occur, and whether the complaint appears during heating, cooling, or both. Distinguish a cold surface from weak airflow at a register.
- Map the thermal boundary. Ask the insulation contractor to identify the continuous boundary separating conditioned space from outdoors or unconditioned areas. Include attic hatches, rim joists, transitions, and penetrations in the discussion.
- Inspect moisture and existing materials. Have leaks, damp substrates, and suspect materials assessed before covering them. Insulation does not repair a roof leak or make an unsuitable substrate ready for spraying.
- Document the proposed assembly. Request the foam product, application locations, intended thickness, required protective covering, and moisture-control approach. Record exclusions around equipment, vents, electrical components, and service areas.
Expected result: You have a drawing or written scope showing the insulated boundary and the areas that must remain accessible or clear. The contractor can explain how adjoining surfaces connect without leaving an unintended gap.
For a 2026 scope of work, distinguish existing conditions from proposed changes. A note saying the attic will be insulated is not enough if it leaves the ventilation strategy undefined.
Choose the attic strategy deliberately
Adding insulation at the ceiling plane and moving insulation to the roofline are different projects. Do not let the spray location decide the attic's ventilation design by accident.
| Approach | Best for | Main advantage | Main limitation |
|---|---|---|---|
| Vented attic with insulation at the ceiling plane | Projects that retain the existing vented-attic design | Keeps the insulated boundary at the ceiling | Ducts remaining in the attic still sit outside the conditioned boundary |
| Designed unvented attic with insulation at the roofline | Projects where a roofline assembly is justified by the building design | Moves the thermal boundary to the roof assembly | Requires coordinated moisture, code, ventilation, and mechanical decisions |
Neither approach automatically fixes HVAC distribution. A roofline installation also does not automatically make the attic a properly conditioned space; the designer must address its intended temperature and humidity conditions.
Recommendation: preserve the planned attic strategy unless a qualified designer specifies a change. Do not block soffit or roof vents in a vented attic, and do not improvise an unvented conversion around existing equipment.
Mechanical assessment
Review loads, airflow, and ventilation
- Request updated load calculations. Give the HVAC contractor the proposed insulation assembly and air-sealing scope. Ask for room-by-room heating and cooling loads using an appropriate residential calculation method, rather than sizing equipment from floor area alone.
- Assess the existing equipment. Have the contractor compare capacity and operating range with the revised loads. Existing equipment does not automatically need replacement, and insulation does not justify selecting a smaller unit without calculations.
- Check distribution. Ask for inspection of accessible supply and return ducts, connections, dampers, and registers. Have airflow restrictions and duct leakage addressed with suitable methods; building spray foam is not a default duct-sealing product.
- Review ventilation and combustion. Have the contractor assess outdoor-air provision, bathroom and kitchen exhaust, and fuel-burning appliances. If a heat-recovery ventilator is present, include its operation and balance in the review.
Expected result: You have a mechanical plan that identifies what stays, what needs correction, and what must be measured after the retrofit. Equipment sizing, fresh-air provision, and combustion safety each have an assigned owner.
Record the calculation assumptions in your 2026 project file. If the installed assembly changes, the HVAC contractor needs the revised details before making final equipment decisions.
Keep the evidence separate
An energy evaluation and an HVAC assessment answer different questions. An evaluation can help identify envelope priorities and measure air leakage; an HVAC contractor assesses equipment, distribution, and mechanical performance.
Use the guide to connect an EnerGuide evaluation to a spray foam retrofit when organizing the envelope side of the project. Ask each professional to explain the scope of their report rather than assuming one report covers every system.
A blower-door test measures building air leakage under test conditions. It does not, by itself, establish whether each room receives enough supply air or whether a furnace operates within its manufacturer's limits.
Installation coordination
Protect the equipment and air paths
- Create a protection list. Mark combustion-air openings, flues, exhaust outlets, intake terminals, condensate components, junction boxes, and equipment service panels. Have the responsible trades confirm required clearances from manuals and applicable requirements.
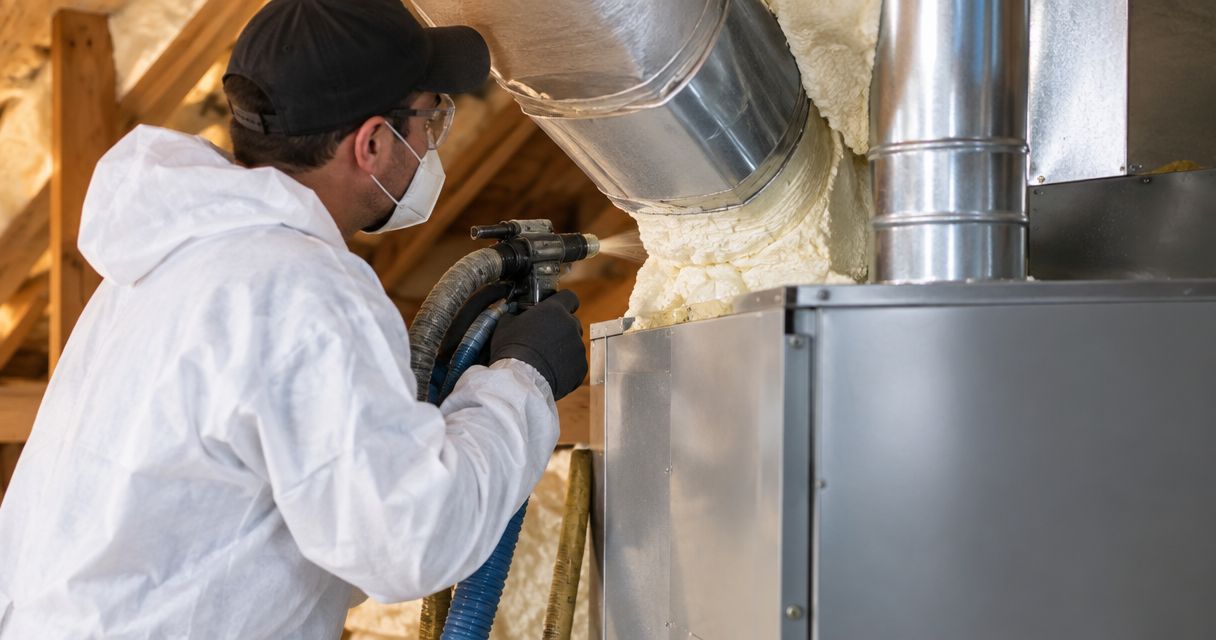
- Agree on HVAC isolation. Let the installer and mechanical contractor determine how equipment, openings, and occupied areas will be protected during application. Do not run the central blower as an improvised way to distribute installation ventilation.
- Confirm the ventilation and re-entry plan. Follow the foam manufacturer's instructions and the installer's site-specific procedures. Keep occupants and pets out of restricted areas until the stated conditions for re-entry are met.
- Inspect before closing assemblies. Have the installer document coverage, transitions, exclusions, and required protective coverings. Confirm that dampers, filters, disconnects, and service access have not been buried or obstructed.
Expected result: The insulation follows the agreed boundary without using HVAC equipment or ducts as part of the application process. Necessary air paths and maintenance access remain intact.
Aztec Spray Systems provides the insulation portion of this workflow. Confirm the exact installation scope directly, and arrange mechanical checks with the appropriate contractor rather than assuming they are included.
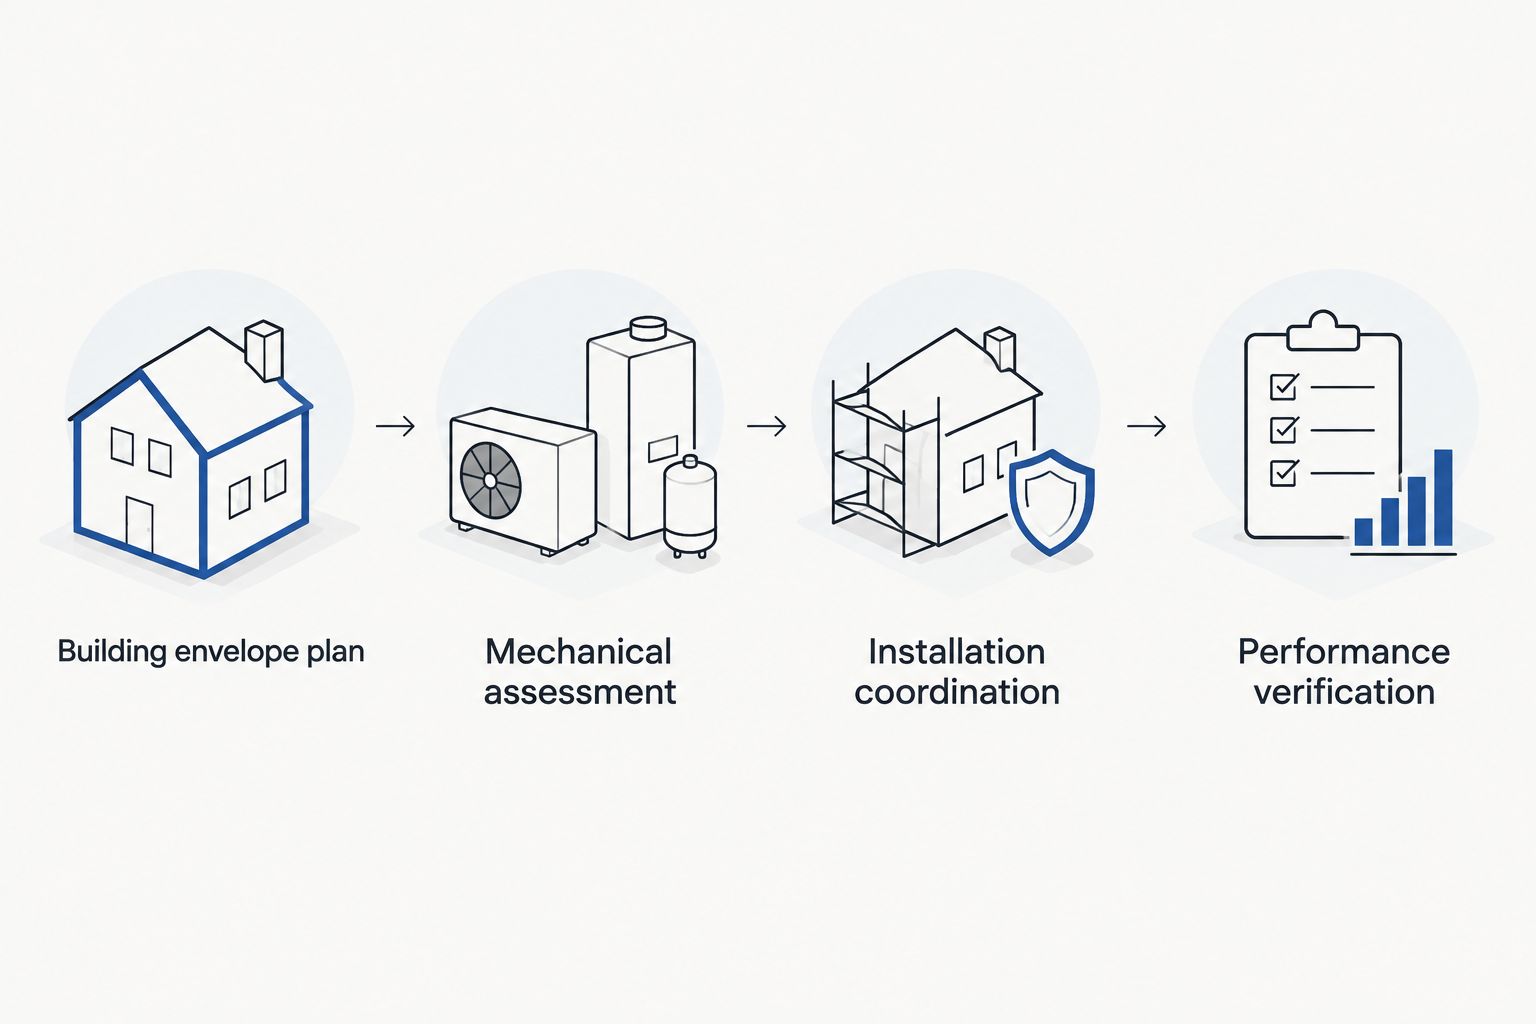
The sequence is straightforward: define the envelope, assess the mechanical implications, protect equipment during installation, and verify operation afterward. Do not leave the mechanical assessment until after foam covers the areas that need inspection.
Performance verification
Check operation before changing controls
- Arrange post-installation checks. Have the HVAC contractor verify relevant equipment operation, airflow, ventilation, and combustion safety after the envelope work. Ask for measured results and the manufacturer's acceptable limits where applicable.
- Compare room conditions. Record temperatures in 3 rooms: the thermostat room, the previously uncomfortable room, and a comparison room. Take 2 readings per observation period, at the beginning and end, and note outdoor conditions and thermostat settings.
- Keep settings stable during comparison. Avoid changing schedules, register positions, and humidifier settings all at once. You need to distinguish the insulation result from a separate control adjustment.
- Save one handover record. Keep the final insulation scope, product documentation, mechanical findings, and outstanding corrective actions together. Include photographs taken before covered areas became inaccessible.
Expected result: You can distinguish remaining envelope problems from airflow or control problems, and you have a written record of the completed work.
Your 2026 temperature log is a diagnostic aid, not proof of energy savings. Bills also reflect weather, occupancy, thermostat settings, and energy rates; do not attribute every change to insulation.
When you replace the HVAC system during the retrofit
If insulation and equipment replacement are planned together, coordinate sizing before ordering equipment. Use the proposed finished envelope for the load calculation, then confirm that the installed assembly matches those assumptions.
- Insulation first: Best for retaining functioning equipment while improving the envelope. The advantage is keeping replacement decisions tied to the revised building; the limitation is that existing equipment still needs assessment afterward.
- Coordinated replacement: Best for projects already requiring new equipment. The advantage is selecting capacity for the planned envelope; the limitation is dependence on accurate specifications and installation sequencing.
| Workflow | Main decision | Required follow-through |
|---|---|---|
| Insulation first | Whether existing equipment remains suitable | Verify operation after the retrofit |
| Coordinated replacement | What equipment suits the finished envelope | Confirm installation matches calculation assumptions |
Do not copy the old equipment capacity into a new order without reviewing the loads. Likewise, do not reduce capacity by an arbitrary percentage because spray foam is being installed.
Troubleshooting
The furnace starts and stops frequently
Have the HVAC contractor diagnose thermostat behaviour, airflow restrictions, equipment faults, and capacity relative to the load. Short cycling does not prove that insulation caused the problem, and replacing the thermostat is not a universal fix.
A room remains cold
Check the room's supply and return paths, accessible duct condition, and envelope transitions. Ask for room-specific assessment before raising the whole home's temperature or adding more foam.
Windows develop condensation
Measure indoor humidity and review ventilation, moisture sources, and window surface temperatures. Do not assume that opening a register or increasing furnace runtime corrects the underlying moisture balance.
An equipment intake or service panel is obstructed
Stop using affected equipment if its safe operation is compromised, and have the responsible contractor correct the obstruction. Do not cut around hot vents or dismantle equipment yourself.
A carbon monoxide alarm sounds
Leave the building immediately and call emergency services from outside. Do not silence the alarm and continue testing the furnace; arrange professional assessment before re-entry and equipment use.
Customize your workflow
Expand the project around the actual comfort problem. A cold bonus room calls for investigation of its floor assembly and duct route; a damp basement calls for moisture assessment before insulation design.
Bring that room-specific information to Aztec Spray Systems for the insulation discussion and to your HVAC contractor for distribution and ventilation decisions. Keep both scopes connected through the same drawing and handover record.
For your 2026 maintenance plan, retain access to filters, ventilation equipment, dampers, and inspection points. An efficient assembly that prevents routine servicing creates a different problem.
FAQ
How do I connect spray foam insulation to my HVAC system?
You coordinate the insulation and HVAC designs; there is no physical or electrical connection. Define the insulated boundary, review heating and cooling loads, protect equipment during installation, and verify airflow, ventilation, and combustion safety afterward.
Can spray foam make my furnace too large for my house?
Reducing the building’s heating load can leave existing equipment oversized relative to the revised load. Ask an HVAC contractor to calculate the updated requirements and assess operation before deciding whether replacement is necessary.
Do I need an HRV after installing spray foam?
An HRV requirement cannot be determined from the insulation material alone. Have a qualified professional assess the home’s ventilation needs, existing mechanical ventilation, building design, and applicable requirements.
Can I spray foam directly onto my furnace or ductwork?
Do not spray building insulation onto HVAC equipment as a way to connect the systems. Any duct insulation application needs a suitable specified product, confirmed compatibility, required clearances, and preserved service access.
Should I keep my attic vents open after spray foam installation?
Keep the designed ventilation paths open in a vented attic. Closing them belongs only to a properly designed change in attic strategy, with moisture and mechanical implications addressed beforehand.
Does Aztec Spray Systems install HVAC equipment?
Aztec Spray Systems’ stated services include spray foam insulation, attic insulation, and concrete lifting, not HVAC installation. Arrange equipment assessment, load calculations, and commissioning with a qualified mechanical contractor.
How long should I stay out after spray foam is installed?
Follow the product-specific and site-specific re-entry instructions supplied for your installation. Do not substitute a generic waiting period for the manufacturer’s requirements and the installer’s ventilation procedures.
One last thing
A warmer room does not prove that its airflow improved. Insulation can reduce the room's heat loss while leaving a duct defect unchanged, so keep any unresolved mechanical finding on the handover record even when comfort improves.
Related guides
- How to air seal an attic before adding insulation
- How to insulate a bonus room above the garage
- How to maintain spray foam insulation after installation